The 2025 Guide to Android App Development
Welcome to the exciting world of Android app development! This guide will walk you through the entire process, from a simple idea to a published app on the Google Play Store, with a focus on the latest tools and best practices for 2025.
1. The Foundation: Programming Languages and Tools
Before you start, you’ll need the right tools and a solid programming foundation.
Key Technologies
- Kotlin: This is the official and preferred language for Android development, and it will be the cornerstone of your work. It’s concise, safe, and fully interoperable with Java.
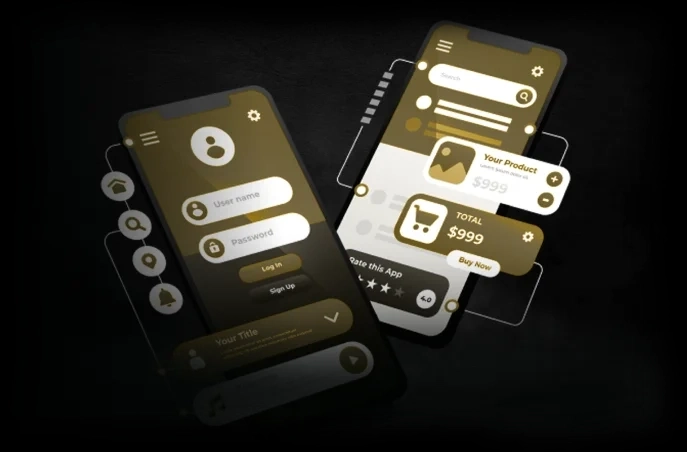
- Jetpack Compose: The modern, declarative UI toolkit recommended by Google. It simplifies UI development by allowing you to build your user interface with less code, and it provides real time previews. While Jetpack Compose is the future, some existing projects still use XML, so it’s a good idea to have a basic understanding of both.
- Android Studio: The official Integrated Development Environment (IDE) for Android. It is the primary tool for coding, debugging, and testing your apps.

2. The Android App Development Lifecycle (ADLC)
The process of creating an app is a structured journey. Here are the key phases:
Phase 1: Ideation and Planning
- Define your idea: What problem does your app solve? Who is your target audience? What are the core features?
- Market Research: Look for similar apps on the Google Play Store. What are their strengths and weaknesses? How can your app be different or better?
- Create a roadmap: Plan out your features, timeline, and goals. Start with a Minimum Viable Product (MVP) that includes only the essential features, and then add more as you go.
- Wireframing and UI/UX Design: Sketch out the layout of your app’s screens and the user flow. This doesn’t have to be formal—even paper sketches can work! The goal is to plan the user experience before you start coding.
[elementor-template id=”1036″]
Phase 2: Development and Quality Assurance
- Set up your environment: Install Android Studio and set up the Android SDK and a virtual device emulator.
- Write the code: Start building your app using Kotlin and Jetpack Compose. Implement the core functionalities you defined in the planning phase.
- Data Persistence: Decide how to store data. For local data, use a Room database. For online data, use cloud services like Firebase.
- Test, test, test: Test your app constantly. Use Android Studio’s built in emulator, and whenever possible, test on a physical Android device to check for bugs and ensure a smooth user experience.
Phase 3: Deployment and Monetization
Once your app is ready, you can release it to the public.
- Publish on Google Play Store: Create a developer account on the Google Play Console, prepare your app listing with screenshots and a description, and upload your app bundle.
- Monetization Strategies (2025 Trends):
- In App Advertising: This is a popular option, especially for free apps. Consider interstitial ads and rewarded video ads, which offer users an incentive to watch.
- In App Purchases: Sell digital goods or features within your app.
- Subscriptions: Offer a premium version of your app with recurring payments for added features or content.
- Hybrid Monetization: In 2025, the most successful apps are using a mix of these strategies to appeal to different users.

3. Top Trends in Android Development for 2025
Staying up to date with the latest trends is crucial for building a successful app.
- AI and Machine Learning (ML) Integration: Use tools like Google ML Kit and TensorFlow Lite to add smart features like image recognition, text analysis, and personalized recommendations.
- 5G Optimization: As 5G becomes more widespread, optimize your app to handle higher speeds and lower latency for a smoother user experience, especially for high data features like streaming or augmented reality.
- Privacy and Security: With stricter regulations like GDPR and CCPA, developers must be more intentional about user privacy. Always ask for permissions when necessary and follow Google’s Data Safety guidelines.
- Cross platform development with Kotlin Multiplatform: While this guide focuses on native Android, Kotlin Multiplatform is a growing trend that allows you to share business logic and UI code between Android, iOS, and other platforms. This is ideal for teams that need to build for multiple platforms.
[elementor-template id=”1036″]
A Guide to Android App Development
This guide provides a comprehensive overview of the Android app development process, covering project goals, practical steps, a summary of the development lifecycle, and how to approach building an app with a professional team.
Brief Overview of the Project Goal
The project goal is the single most important element of any app. It goes beyond a simple idea and defines the app’s purpose, its target audience, and the problem it aims to solve. A clear, well defined goal acts as your “North Star,” guiding all subsequent decisions. It’s about moving from “I want to make a to do list app” to “I want to create a simple, intuitive todo list app for students to help them manage their weekly assignments and study habits.”
Key aspects to define:
- What is the core purpose? What is the one thing this app must do?
- Who is the target audience? Who will use this app?
- What problem are you solving? What pain point does your app address?
- What is the success metric? How will you measure if the app is successful (e.g., number of downloads, daily active users, user retention)?
[elementor-template id=”1036″]
Steps to Create Your First Android App Practically
Building your first app is a hands on experience that solidifies theoretical knowledge. With the rise of modern development tools and practices, the process has become more streamlined.
- Install Android Studio and Set Up Your Environment: This is the official and most widely used Integrated Development Environment (IDE) for Android. Download it from the official Android developer website.
- Learn Kotlin and Jetpack Compose: Kotlin is the official and recommended programming language for Android due to its concise syntax and safety features. Jetpack Compose is Google’s modern, declarative UI toolkit that allows you to build user interfaces much faster than with traditional XML layouts.
- Create a New Project: Open Android Studio and select “New Project.” Choose a template like “Empty Activity” to start with a blank canvas.
- Design the User Interface (UI): Use Jetpack Compose to define your app’s layout. You will describe what your UI looks like using Kotlin code, and Android Studio provides a real time preview.
- Add Core Logic and Functionality: Write Kotlin code to handle user interactions, manage data, and connect the UI to the backend. This is where you implement the features that you defined in your project goal.
- Test Your App: Use the built in Android Emulator to run and test your app on various virtual devices and screen sizes. This ensures your app works as expected and is responsive across different form factors.
- Generate a Signed App Bundle: When your app is ready for release, you’ll create a signed app bundle (.aab file) from Android Studio, which is the official format for publishing to the Google Play Store.
[elementor-template id=”1036″]
Process Summary of Android App Development
This is a high level view of the entire development lifecycle, often used by professional teams to manage a project.
- Discovery Phase: Define the project goal, conduct market research, and create user personas. This phase is about validating the app idea and creating a clear project roadmap.
- UX/UI Design: The user experience (UX) team creates wireframes and user journey maps, while the user interface (UI) designers create mockups and visual designs. The focus is on creating a user friendly and aesthetically pleasing app.
- Development: The core coding phase. Developers write the app’s code, implement features, and build the backend infrastructure (if needed). This phase often follows an agile methodology, with work broken into short “sprints.”
- Quality Assurance (QA) and Testing: The QA team rigorously tests the app to identify and fix bugs, ensuring it is stable and performs well on different devices and Android versions.
- Deployment: The app is published to the Google Play Store. This involves creating a developer account, preparing the app listing with descriptions and screenshots, and uploading the signed app bundle.
- Post Launch Support & Maintenance: The journey doesn’t end at launch. This phase involves monitoring app performance, collecting user feedback, releasing updates with new features, and fixing bugs.

How to Make an Android App with a Professional Company
Hiring a development company means leveraging their expertise and established processes. The collaboration typically involves several key steps.
- Initial Consultation: You present your app idea and project goals to the company. They will provide an estimate of the project’s scope, timeline, and cost.
- Project Kick off and Discovery: You work closely with their team (project managers, designers, and developers) to refine your idea. This is a critical period for defining all requirements and technical specifications.
- Ongoing Collaboration: The company’s team will keep you involved throughout the process through regular communication, progress reports, and demos. You will provide feedback at each stage to ensure the app aligns with your vision.
- Deployment and Launch: The company handles the technical aspects of preparing the app for the Google Play Store, including all necessary compliance and security checks.
- Post Launch Support: Most professional companies offer maintenance and support packages to ensure the app remains secure, up to date, and performs optimally after launch.
[elementor-template id=”1036″]
FAQs
Is making an Android app hard?
It depends on the complexity of the app and your programming experience. A simple app with basic functions can be a good starting project for a beginner, while more advanced apps with features like real time data or in app purchases have a steeper learning curve.
Is it free to make an Android app?
The main development software, Android Studio, is free. However, to publish your app on the Google Play Store, you must pay a one time registration fee of $25.
What programming language is used for Android apps?
Kotlin is the official and recommended programming language for Android. Java is also widely used and is supported by the Android platform.
How much time does it take to build an Android app?
The time varies greatly depending on the app's complexity. A simple app can take 1 to 3 months, a moderate complexity app can take 4 to 6 months, and a complex app can take 7 months or more.
How much does it cost to build an Android app?
For a professional development team, the cost can range from $25,000 to over $300,000, depending on the app's complexity, features, and the location of the development team. A simple app may cost between $25,000 and $50,000.