In the fast-paced world of mobile application development, speed and efficiency are paramount. Before committing significant resources to full-scale development, having a clear and tangible representation of your app idea is crucial. This is where a mobile app prototype comes into play. A prototype, in essence, is a preliminary, interactive model of your app that demonstrates its core functionalities and user experience without requiring extensive coding.
Differences Between Prototype And MVP
Here’s a brief breakdown of the key differences between a Prototype and an MVP (Minimum Viable Product):
Functionality:
- Prototype: Has limited or simulated functionality, often just enough to demonstrate the look, feel, and core user flow. It’s not fully operational.
- MVP: Is a fully functional, albeit stripped-down, version of the product with the absolute essential features that provide core value to a user.
Purpose:
- Prototype: To visualize, test design ideas, validate concepts, gather early feedback on UX/UI, and secure stakeholder or investor buy-in before extensive development.
- MVP: To launch a viable product to the market quickly, gather real user feedback, validate business assumptions, test market demand, and attract early adopters.
Complexity:
- Prototype: Generally less complex, focusing on specific interactions or screens. Can range from low-fidelity (sketches) to high-fidelity (interactive mockups).
- MVP: More complex than a prototype, as it requires a stable, working product with backend functionality, even if minimal.
Time:
- Prototype: Quicker to build, often taking days to a few weeks, depending on fidelity.
- MVP: Takes more time, typically weeks to a few months, as it involves actual development, coding, and testing for functionality.
Cost:
- Prototype: Relatively low cost, mainly involving design tools and design hours.
- MVP: Higher cost than a prototype due to the involvement of development (coding, backend), testing, and deployment.
[elementor-template id=”1036″]
Benefits Of A Mobile App Prototype
- Clarity: A prototype transforms abstract ideas into a tangible, interactive model, making the app’s concept, features, and user flow clear and understandable to everyone involved.
- Collaboration: It provides a common visual tool for designers, developers, stakeholders, and potential users to discuss, refine, and agree upon the app’s direction effectively.
- Simpler Acceptance: With a clear, interactive prototype, getting buy-in and final approval from clients or stakeholders becomes easier as they can “experience” the app before extensive development begins.
- No Surprises: By identifying potential design flaws, usability issues, or misinterpretations of requirements early on, prototypes prevent costly and time-consuming surprises during later development stages.
- More Predictability: Prototypes help in refining the scope, features, and user journeys, leading to more accurate estimations for development time, resources, and budget.
- Cheaper: Identifying and fixing issues at the prototyping stage is significantly less expensive than making changes once coding has already begun, thus saving substantial development costs.
[elementor-template id=”1036″]
Types Of Prototypes
Sure, let’s define and describe these specific types of prototypes:
Types of Prototypes
Prototypes are essential tools in app development for validating ideas and refining user experience. They vary in detail and interactivity.
1. Paper Prototypes
- Definition: These are the simplest, most basic form of low-fidelity prototypes, created by drawing app screens and interactions on paper, whiteboards, or sticky notes.
- Description: Paper prototypes are non-digital sketches that represent the layout, content, and basic flow of an application. They are intentionally rough and unfinished, focusing on conceptualizing ideas rapidly rather than aesthetics. Users can “interact” with them by pointing or gesturing, and a facilitator (the “human computer”) can swap out screens or simulate actions based on user input. They are incredibly cheap and quick to produce and modify.
- When to use: Ideal for early-stage brainstorming, rapid iteration of user flows, and getting very quick feedback on broad concepts. Perfect for validating information architecture and navigation before any digital design work begins.
2. Low-Fidelity Prototypes
- Definition: These are simplified, often static or minimally interactive representations that focus on the app’s structure, layout, and core functionality, without much visual detail or polish.
- Description: Low-fidelity prototypes move beyond paper but still maintain a basic, unpolished look. They can be digital wireframes (skeletal outlines of screens) that show where elements like buttons, text, and images will be placed. They might have basic clickability to simulate navigation paths between screens. The emphasis is on functionality and user flow rather than visual design. They are quick to create and easy to modify based on feedback.
- When to use: Excellent for defining information hierarchy, testing basic user flows, validating features, and ensuring all stakeholders are aligned on the core structure and functionality of the app. Tools used often include Balsamiq, Figma (for basic wireframing), or even PowerPoint/Keynote.
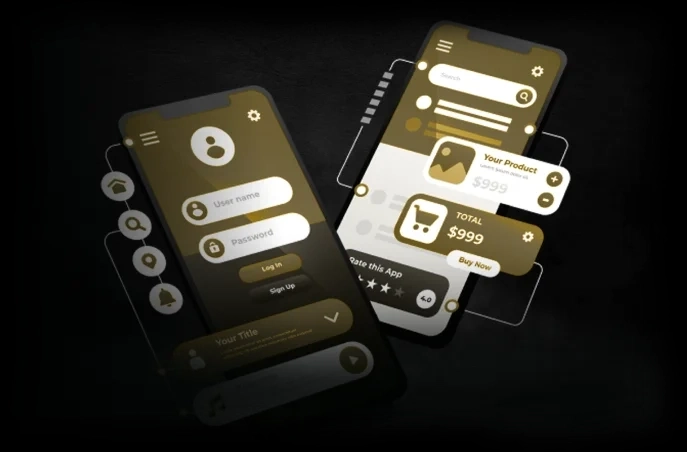
3. High-Fidelity Prototypes
- Definition: These are detailed, highly interactive representations that closely mimic the final product’s look, feel, and functionality, providing a near-real user experience.
- Description: High-fidelity prototypes are almost indistinguishable from the final app in terms of appearance and interaction. They incorporate polished visual design elements (exact colors, typography, imagery, icons), micro-interactions, animations, and complex user flows with conditional logic. Users can interact with them as if they were using the actual app, allowing for very realistic user testing and comprehensive feedback on both usability and aesthetics. While more time-consuming to create than lower-fidelity versions, they significantly reduce the risk of costly changes during the coding phase.
- When to use: Best for in-depth user testing, investor presentations, sales demos, and as a precise blueprint for development teams. They help in catching subtle usability issues and ensuring that the final product aligns perfectly with the envisioned user experience. Tools include Figma, Adobe XD, Sketch (often paired with InVision for interactivity), and ProtoPie.
[elementor-template id=”1036″]
Prototype Prerequisites
Before diving into building a prototype, certain foundational steps are crucial to ensure that the prototype is relevant, accurate, and truly serves its purpose. These prerequisites help in understanding the user, defining the problem, and outlining the solution effectively.
1. Carry Out User Research
- Definition: This involves systematically investigating and understanding the needs, behaviors, motivations, and pain points of your target users through various methods.
- Description: User research is the cornerstone of designing a user-centric app. It’s about getting out of your own head and into the minds of your potential users. This process can include:
- Interviews: One-on-one conversations to delve deep into user experiences, needs, and frustrations.
- Surveys: Collecting quantitative and qualitative data from a larger audience.
- Observation: Watching users interact with existing solutions or perform relevant tasks.
- Competitor Analysis: Understanding what competitors are doing well and where they fall short.
- Persona Creation: Developing fictional representations of your ideal users based on research data, detailing their goals, behaviors, and pain points.
- User Journey Mapping: Visualizing the steps a user takes to achieve a goal, identifying touchpoints, emotions, and pain points along the way. By conducting thorough user research, you ensure that your prototype addresses real problems for real users, increasing its chances of success and avoiding costly redesigns later.
2. Gather Application Project Requirements
- Definition: This is the process of identifying, documenting, and managing the functional and non-functional needs, features, and constraints of the mobile application project.
- Description: Once you understand who you’re building for (from user research), you need to define what you’re building. Gathering requirements translates user needs and business goals into concrete specifications for the app. This involves:
- Functional Requirements: What the app must do (e.g., user login, search functionality, payment processing, push notifications). These describe the specific actions and behaviors of the system.
- Non-Functional Requirements: How the app must perform (e.g., speed, security, scalability, usability, compatibility). These define the quality attributes of the system.
- Business Requirements: The high-level goals and objectives the app aims to achieve for the business (e.g., increase customer engagement by 20%, reduce customer support calls).
- Technical Requirements: Specific technologies, platforms, or integrations needed (e.g., iOS and Android compatibility, API integrations).
- Scope Definition: Clearly outlining what features will be included in the prototype and, crucially, what will be explicitly excluded to manage the project within a specific timeframe (like a week). Effective requirements gathering ensures that the prototype focuses on the most critical features and functionalities, aligning the development efforts with business objectives and user needs. It acts as a blueprint for what needs to be designed and tested in the prototype.
[elementor-template id=”1036″]
Step-By-Step Guide To Building Your Mobile App Prototype
Got it. Let’s outline a step-by-step guide to building a mobile app prototype, keeping in mind the need for efficiency, especially if aiming for a rapid turnaround.
Step-By-Step Guide to Building Your Mobile App Prototype
Building a prototype involves a structured process that moves from ideation to an interactive model. Here are the key steps:
1. Define Core Functionality (What’s Essential?)
Description: This initial step is about brutally prioritizing and identifying the absolute most critical features and user flows that your prototype needs to demonstrate. Given the goal of rapid prototyping (e.g., in a week), you cannot include every single idea. Instead, focus on the unique selling proposition (USP) or the core problem your app solves. What is the single most important thing the user should be able to do with this prototype? What must it show to validate your concept or get feedback?
Why it’s important: Prevents scope creep, keeps the project focused, and ensures that the prototype can be built within a constrained timeframe and budget. It directly ties into the “Minimum Viable” aspect, even for a prototype.
2. Sketch Your App Idea (Paper Prototypes First!)
Description: Before touching any digital tools, grab a pen and paper (or a whiteboard). Sketch out the main screens of your app and the connections between them. Think about the user’s journey from start to finish for your defined core functionalities. Don’t worry about aesthetics; focus on layout, content placement, and the flow. Draw boxes for buttons, text, and images. Each sketch represents a single screen or a key state change.
Why it’s important: It’s the fastest and cheapest way to iterate on ideas. Mistakes are easily erased or crumpled. It forces you to think about user flow and screen layout without getting bogged down in visual details. It’s a low-risk way to visualize and discuss your concept with others.
3. Choose Your Prototyping Tool (Based on Fidelity)
Description: Select the software or platform that best suits the fidelity level you aim for and your team’s expertise.
- Low-to-Medium Fidelity: Tools like Figma, Sketch, Adobe XD, or Balsamiq are excellent for creating wireframes and basic mockups. They allow for easy drag-and-drop design of UI elements and often have basic prototyping features to link screens.
- High-Fidelity: Figma, Adobe XD, InVision, or ProtoPie are robust choices for creating interactive prototypes with animations, micro-interactions, and complex logic that closely mimic a real app.
Why it’s important: The right tool streamlines the design process. Choosing a tool that allows for quick iteration and the desired level of interactivity is crucial for efficiency. Familiarity with the tool can significantly cut down development time.
4. Design the User Interface (UI)
Description: This step involves translating your sketches into digital screens using your chosen prototyping tool. Focus on the visual elements:
- Layout: Arrange buttons, text fields, images, and other UI components on each screen.
- Typography: Select fonts and text sizes for headings, body text, etc. (even if it’s just a placeholder font initially).
- Color Palette (Basic): Apply a basic color scheme that aligns with your brand or desired aesthetic.
- Iconography: Use placeholder or basic icons to represent actions or categories.
- Consistency: Maintain a consistent look and feel across all screens.
Why it’s important: The UI dictates how users visually perceive and interact with your app. A well-designed UI is intuitive and engaging, making the prototype easier to understand and test.
5. Implement Interactivity (Bring it to Life)
Description: This is where your static designs become an interactive experience. Use the prototyping features within your chosen tool to define how users navigate and interact:
- Link Screens: Connect buttons, icons, or specific areas on one screen to another screen (e.g., clicking a “Login” button takes you to the “Home” screen).
- Transitions: Add simple animations or transitions between screens (e.g., slide, fade).
- Basic Interactions: Simulate common actions like scrolling, swiping, or typing in a field (though actual data entry usually isn’t functional in a prototype).
- Conditional Flows: For high-fidelity, you might implement basic “if-then” logic (e.g., “if user clicks X, show Y; otherwise show Z”).
Why it’s important: Interactivity is what makes a prototype truly valuable. It allows users to “use” the app, giving you realistic feedback on the flow, usability, and overall experience, rather than just looking at static images.
6. Test Your Prototype (Get Feedback!)
Description: This is a crucial, iterative step. Don’t just show your prototype; test it with actual potential users.
- Internal Review: First, have your team and stakeholders test it for bugs, inconsistencies, or missed requirements.
- User Testing: Then, put the prototype in front of a few target users. Give them specific tasks to complete (e.g., “Find product X and add it to your cart”). Observe how they navigate, where they get confused, and what their verbal feedback is. Encourage them to “think aloud.”
- Gather Feedback: Systematically collect all feedback, noting both positive comments and areas for improvement.
Why it’s important: User testing reveals usability issues, unclear navigation, or features that don’t make sense to real users before you spend time and money coding them. This early validation saves immense resources in the long run.
7. Iterate and Refine (Repeat as Needed)
Description: Based on the feedback from testing, go back to your prototype and make the necessary adjustments. This could involve:
- Changing screen layouts
- Rewording labels or instructions
- Modifying navigation paths
- Adding or removing elements
- Improving the visual design The prototyping process is cyclical: define, design, test, and refine. Repeat until you have a prototype that effectively meets your goals.
Why it’s important: Iteration is how you improve the prototype and ensure it aligns with user needs and business objectives. This continuous refinement process maximizes the value of the prototype before moving into full development.
By following these steps, you can efficiently build a valuable mobile app prototype that serves as a strong foundation for your app’s development.
[elementor-template id=”1036″]
Conclusion:
In conclusion, building a mobile app prototype, even within a tight timeframe like a week, is not just feasible but highly advantageous for any app development project. While it won’t yield a fully coded, functional application, it provides an invaluable interactive blueprint that serves multiple critical purposes.
By carefully defining core functionality, sketching ideas on paper, leveraging the right prototyping tools, designing intuitive UIs, and implementing key interactivity, you can rapidly bring your app concept to life. The iterative process of testing the prototype with users and refining it based on feedback is where the true power lies, allowing you to catch usability issues and conceptual flaws early and at a significantly lower cost than fixing them during full development.
Ultimately, a well-executed prototype fosters clarity, enhances collaboration among teams and stakeholders, simplifies acceptance, eliminates costly surprises, and introduces a higher degree of predictability into the entire development lifecycle. It’s an investment that pays dividends by mitigating risks, saving resources, and ensuring that the final mobile application truly meets user needs and stands a better chance of success in a competitive market.