Steps For Day 1
The initial day of app development is crucial for building momentum and establishing a stable foundation, focusing less on complex coding and more on definition, setup, and verification.
1. Define the MVP (Minimum Viable Product)
The very first action is not technical, but conceptual: clearly define the core problem your app solves. Many new developers fall into the trap of feature creep. To combat this, you must ruthlessly determine the MVP, which is the absolute smallest set of features required for the app to be functional and deliver value. For example, if you aim to build a note-taking app, the Day 1 MVP should be: “A user can open the app, type text into a screen, and save it.” Resist the urge to plan cloud sync, formatting tools, or drawing features on Day 1; these belong in later sprints.
2. Choose and Set Up the Environment
Next, you must select your platform and set up your tools. Your choice dictates the required software: Xcode for native iOS development (Swift/SwiftUI), Android Studio for native Android (Kotlin/Java), or an editor like Visual Studio Code (VS Code) for cross-platform frameworks like Flutter or React Native. This step often involves large downloads and configuration, so start it early.
After installation, the goal is to successfully run a basic “Hello World” project on the built-in emulator or simulator. A working environment is a significant Day 1 victory, proving you’ve overcome the most complex installation hurdles.
3. Initialize the Project and Version Control
Once the environment is confirmed, create a new project in your chosen IDE using the most basic template (e.g., a Single View Application). The most critical technical step for long-term health is initializing Version Control by creating a local Git repository. This safety net tracks every change, allowing you to confidently experiment and revert mistakes without fear of destroying your work. Finally, write a tiny piece of custom code (like changing the title of the main screen) and successfully compile and run it.
This action confirms your code edits are being processed by the IDE and running on the simulator, completing your initial development loop. By the end of Day 1, you should have a clear goal, a fully configured toolset, and a version-controlled project ready for feature building.
Mobile App Development Preparation
Preparing for mobile app development is a multi-faceted process that extends far beyond just learning to code. It requires rigorous strategic planning, market analysis, design foresight, and technical readiness to ensure the final product is viable, user-friendly, and successful in a competitive marketplace. Skipping these preparatory steps is a common cause of failure in app projects.
Strategic and Market Preparation
Before a single line of code is written, a strong foundation must be built on business strategy and market understanding.
- Define the Problem and Audience: Clearly articulate the core problem the app solves and who the target audience is. Creating detailed user personas helps tailor design and features to specific user needs and behaviors. An app without a clear purpose or audience is destined to fail.
- Conduct Competitive Research: Analyze existing apps in the same niche. What are their strengths, weaknesses, and unique selling points (USPs)? Examine user reviews to identify pain points competitors have missed, which can inform your app’s differentiating features.
- Determine Monetization Strategy: Decide early how the app will generate revenue. Common models include Freemium (free with paid features), Subscription, In-App Purchases, or In-App Ads. This choice influences the app’s design, feature set, and overall business plan.
- Establish the MVP (Minimum Viable Product): Define the smallest set of features required to deliver the core value. This focuses initial development, manages scope, and provides a product that can be launched quickly for early feedback.
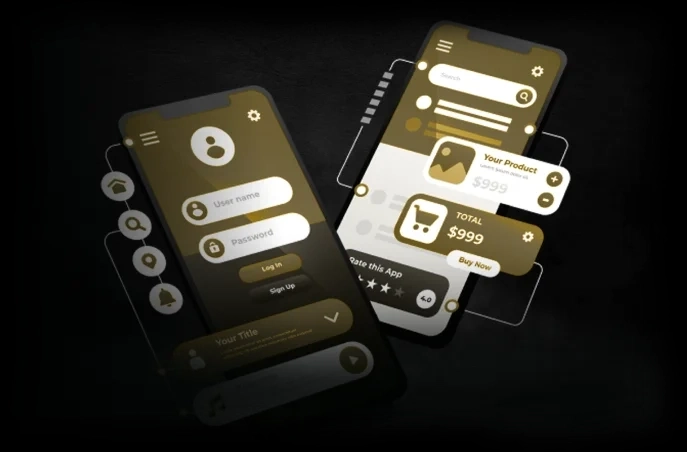
Design and User Experience (UX/UI) Preparation
User experience is critical for mobile app success, demanding extensive planning.
- Wireframing and Prototyping: Create wireframes (skeletal blueprints) to outline the app’s structure and flow. Move on to interactive prototypes (using tools like Figma or Sketch) to visualize the user journey and test navigability before development begins.
Shutterstock
- Define the User Journey: Map out the exact steps a user will take to complete key tasks within the app. This ensures the app is intuitive, reduces friction, and maintains a seamless flow.
- Establish Visual Design Guidelines: Finalize the app’s branding, including color palettes, typography, and icon design. Consistency in the User Interface (UI) across all screens is essential for a polished, professional look.
Technical and Operational Preparation
The technical framework and team logistics must be finalized before coding can commence.
- Choose the Technology Stack: Select the development approach based on budget, timeline, and target audience:
- Native Development (Swift/Kotlin/Java): Offers the best performance and access to device features but requires separate codebases for iOS and Android.
- Cross-Platform (Flutter/React Native): Uses a single codebase for both platforms, reducing time and cost.
- Hybrid (Cordova/Ionic): Uses web technologies wrapped in a native container, generally faster to develop but may sacrifice performance.
- Technical Requirements and Architecture: Document all functional requirements (what the app does) and non-functional requirements (performance, security, scalability). Design the app’s architecture, including its database, server infrastructure, and necessary third-party APIs.
- Development Setup and Team: Decide whether to use an in-house team or outsource the development. Choose a development methodology (like Agile with defined sprints) and set up essential tools like an Integrated Development Environment (IDE) (e.g., Xcode, Android Studio) and a Version Control System (e.g., Git/GitHub).
How to Build an App — Getting Started in 5 Days
The concept of building an app or, more accurately, a fully functional Minimum Viable Product (MVP) in a concentrated five-day period is a practical strategy that divides the often overwhelming development process into distinct, manageable sprints. This framework is defined by its intensity and rigid focus on delivering core value quickly.
Day 1: Define & Setup
Here, the process begins on, which is dedicated entirely to strategic clarity and technical preparation. The developer must first lock down the MVP, defining the absolute simplest feature set that delivers the app’s primary value. Once the scope is fixed, the focus shifts to resolving all technical prerequisites, including downloading and installing the required Integrated Development Environment (IDE), setting up the necessary SDKs, and, critically, initializing Version Control (Git). The key deliverable for this day is a project that successfully compiles, proving the development environment is stable and ready.
Day 2: Design & Architecture
That is the planning phase. No major features are coded, but the entire structure is mapped out. This involves creating simple wireframes or flowcharts to define the entire user journey and the UI layout of the MVP screens.
Simultaneously, the developer designs the app’s internal framework by defining the basic database schema, determining what data is stored and outlining the necessary API endpoints for data retrieval and manipulation. This disciplined blueprinting ensures the code written on subsequent days is structured and avoids costly architectural redesigns.
Day 3: Core Feature Implementation
The pivotal phase is here, where the main value proposition of the app is brought to life. This day is reserved for coding the single, most critical feature that validates the app’s existence, such as the core posting mechanism for a social app or the primary calculation engine for a utility app. The entire effort is concentrated on making this central functionality robust and demonstrably working, creating the foundation for the entire application.
Day 4: Secondary Feature & Polish:
The focus shifts to connectivity and presentation. The developer implements all necessary supporting features, such as basic user authentication (login/sign-up) and the overall navigation structure, ensuring all core screens created in the previous days are seamlessly linked. Basic aesthetic polish, including consistent fonts, colors, and clean layouts, is also applied to elevate the app from a raw prototype to a presentable MVP.
Day 5: Testing, Debugging & Deploy
The final stage is here. This is the quality assurance sprint, where the developer meticulously tests every aspect of the defined MVP user flow to identify and eliminate bugs. After thorough debugging and final code cleanup, the app is prepared for initial user feedback by deploying it to a closed testing platform, like TestFlight or internal distribution services. This five-day framework results in a testable, validated product ready for the next cycle of feature iteration.
Conclusion
The five-day plan for building an app’s Minimum Viable Product (MVP) serves as a rigorous, actionable framework to quickly transform a concept into a testable reality. By strictly dedicating each day to a critical step from defining the scope and setting up the environment (Day 1), to designing the architecture (Day 2), implementing core features (Day 3), adding polish and supporting elements (Day 4), and finally testing and deploying (Day 5), developers ensure focused momentum and deliver a validated, functional application ready for iteration, thus overcoming the initial hurdle of getting started.